Episode 1 resulted in a quick-and-dirty improvised hack that did the job, but not completely or with any finesse. Frictioning the bobbins on my Lazy Kate (I'm not sure I've ever heard why the device is called that) does work to a point, but it's not precisely controllable or adjustable the way a proper tensioning system is. My brain kept noodling away on the problem, and I've spent the last couple of weeks collecting the pieces it came up with to build a truly tensionable adaptation for the JourneyWheel Bobbins.
Here are the materials:
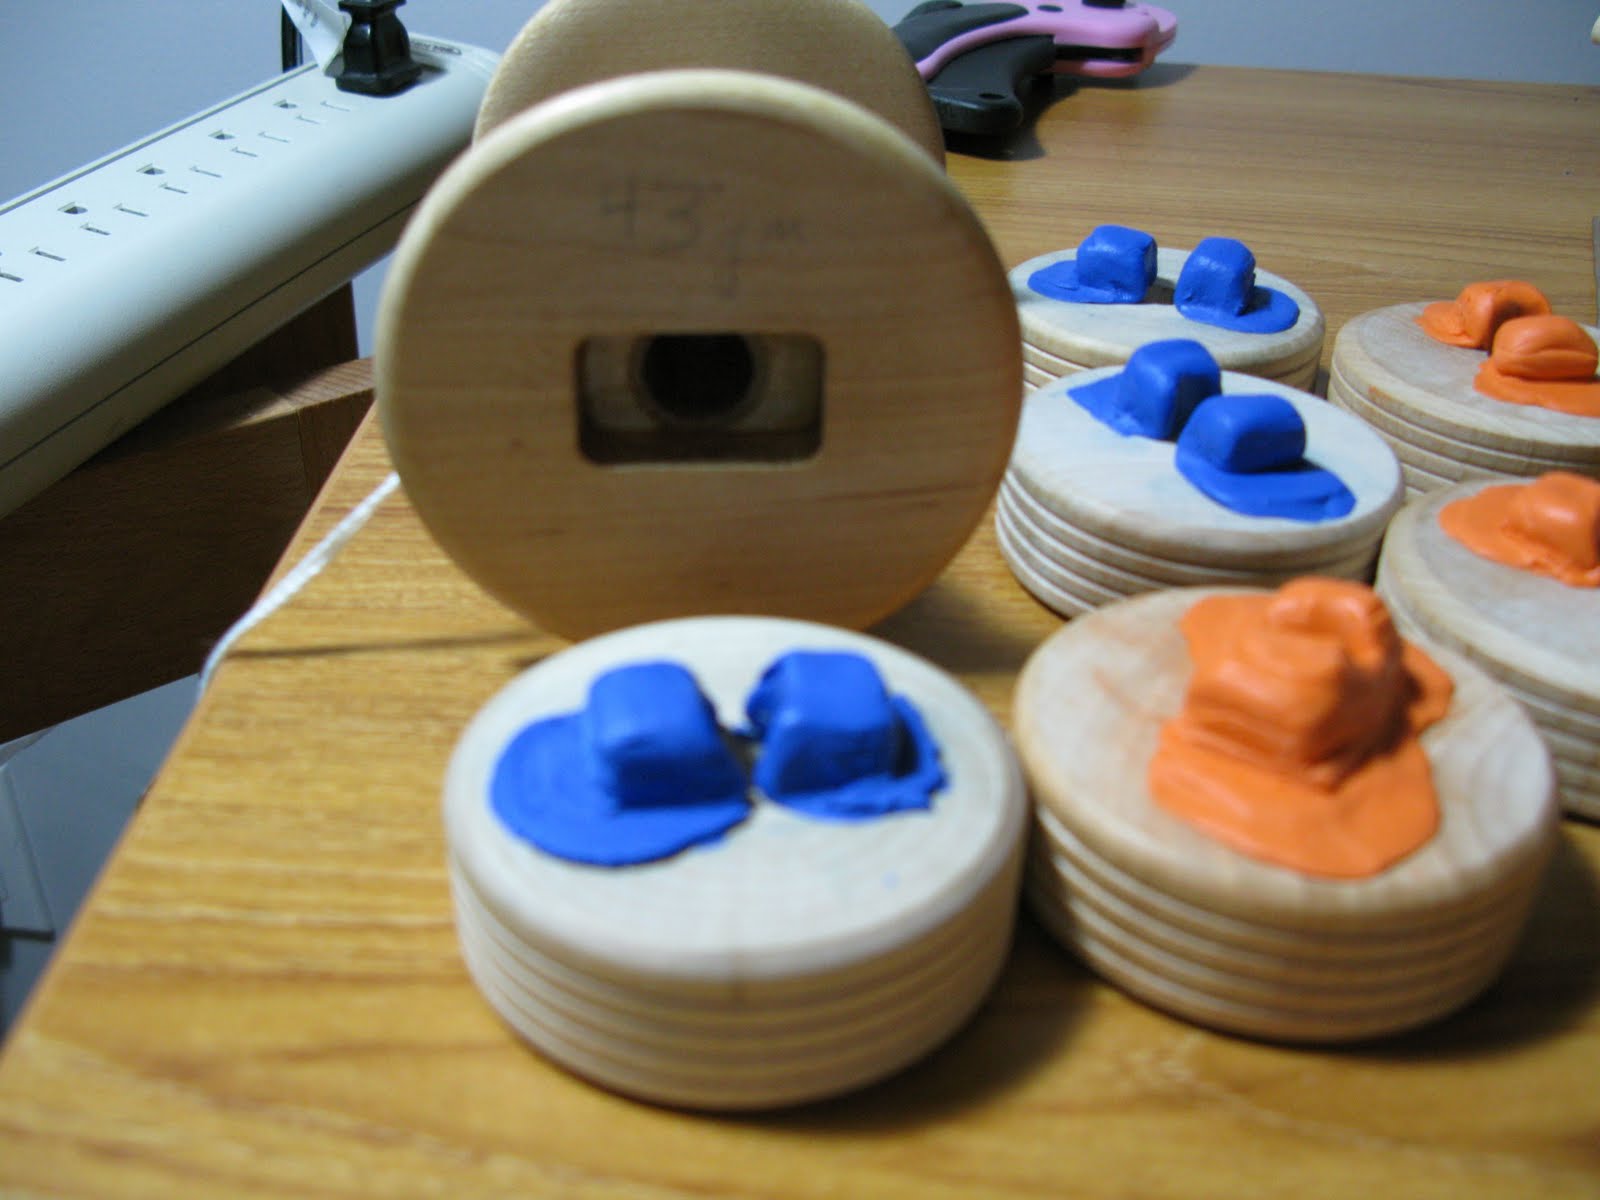
- Of course, my Lazy Kate and JW bobbins.
- Some "treaded" toy wheels from Lee Valley. I found these in their online catalogue, item #41k01.68. Since my gene pool lives in a city that has a Lee Valley retail outlet, my sis picked them up for me. About $0.80 each.

- This interesting substance known as Sugru, which, when contemplating this problem I remembered reading about online somewhere, and went back and looked up. Now, I didn't know much about it other than what the Sugru company themselves were promoting, but it sounded darned neat, and was not a huge investment to buy a Smart Hacks Super Pack. Having played with it now, I can say it's a unique and quite fun substance, and certainly did this job well. Imagine a hybrid of plasticine and rubber cement, in pretty, bright colours.


Here was the basic idea. Use the Sugru to mold a "plug" that would connect into the locking end of my JourneyWheel bobbin, which is where the bobbin clicks into the flyer. Stick that plug to the flat side of the unfinished wood toy wheel. Let it cure (bobbin DISconnected while curing), to result in a toy wheel that could tightly "plug in" and "unplug" from the bobbin, and then be put on the Lazy Kate, with the tensioning string run around the "treads" on the rim of the toy wheel.
Notes:
I chose to use the orange packets of my Smart Hacks Super Pack first - thinking, if they worked, fine, and if I had to scrape it off and start over, orange was my least favourite colour. It turned out to be the better choice for a different reason. I noted that the colour in the Sugru will slightly stain the wood. I scrubbed most of it off the bobbin with no trouble, but the orange dye was probably closest to the natural tone of the wood for the bobbin - the blue or green might have left a more obvious stain.
So,while the little 5 gm lump didn't look like a lot, and I originally broke out two packets to mold the first "plug", it turned out I didn't need two, and I redistributed for the 2nd and 3rd adapter so those actually had less than one packet each. I'd already got the molding right for the first, so didn't want to peel it all off.
In order to mold the plug, I pressed the Sugru onto the toy wheel, then used the bobbin end to push onto the lump and mold the right shape.

This led to a few trial-and-error attempts when the Sugru stuck to the bobbin and came off the toy wheel, but I tried a few times and found that pressing the bobbin lightly and pulling away quickly made enough of a mold for this to work - it wasn't necessary to press the two pieces together very hard. One thing that I was going to resort to if I still had trouble was buffing the JourneyWheel bobbins with my waxy/oily Wood Beams polish, which would probably protect the wood from sticking, while the unfinished toy wheel would stay more adherent. I didn't need that in the end.
I used a wide soda straw through the centre of the toy wheel and the lumps of sugru, to keep a hole open, as the whole thing in the end has to fit over a thin rod on the Katie. Rolling the straw around the inside of the molded lump opened an even hole in the Sugru of the same diameter as the toy wheel hole, which is 3/8", which should be adequate to fit over the posts of any Lazy Kate model I've encountered yet.

So, after a little bit of fiddling, and then 48 hours to cure (it cures to 3 mm in 24 hours, according to product info, I left it longer as it was bigger lumps), I tried connecting it all up.

"Plugged in" the bobbins, loaded the bobbin-plus-wheel assembly onto Kate, and ran the tension string around the grooves in the wheel. Ta-DAAA! Adjustable, tensioned JourneyWheel bobbins for your plying pleasure. Now I just have to get the time to ply all these bobbins of yarn I have.


One thing remains to be discovered. I'm not sure how to pronounce Sugru. Soo-groo? SUG-roo? Or is the SU as in "sugar" - Shug-roo? Let me know.